
Last updated January 2026
Looking for ways to consume less energy at home? Our section on how to save energy at home shares 30 ways to cut your utility costs—and help the planet. Many are cheap and effective.
As we discuss in that section, for many homes the most cost-effective energy saver is to install or add insulation in spots that need it, and to seal cracks and gaps to reduce air leakage. Heating and cooling are by far the biggest energy eaters for Delaware Valley area homes, typically accounting for about two-thirds of utility expenses. If your home is under-insulated or has many air leaks, heat escapes during winter—along with your money. In summer, heat flows into cool spaces in your home, raising your cooling bill. Improving insulation and eliminating air leaks will also make your home more comfortable.
Incentives Can Help Pay for Project Costs
Energize Delaware has generous rebates for homeowners that will cover 50 percent of costs for most insulation projects and 75 percent of costs for air-sealing jobs. PGW also has a rebate program for attic insulation. Unfortunately, at the time of this writing we couldn’t identify incentive programs available from other local utilities, which are common in many other regions of the U.S.
Click here for a list of energy-saving rebate programs available in the Delaware Valley area as of this writing. Also check EnergyStar.gov and with your utilities for up-to-date info (utility programs tend to come and go quickly).
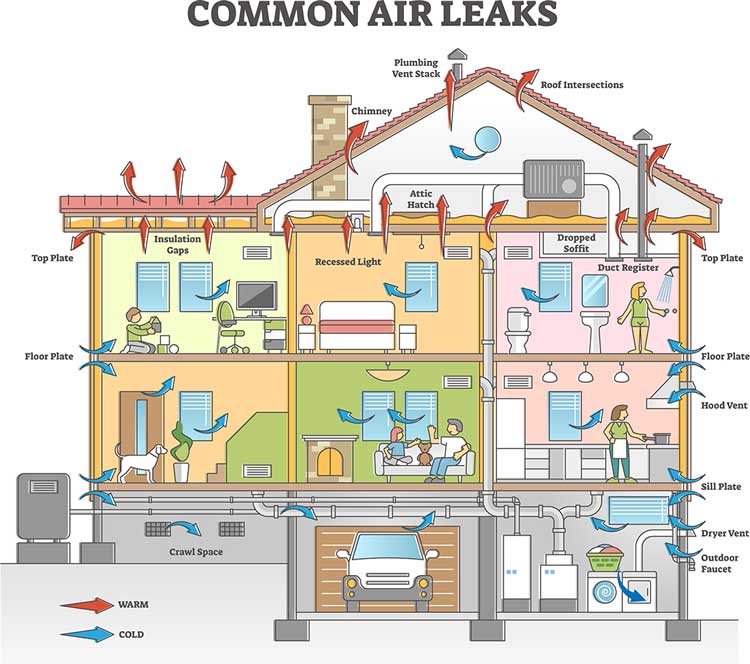
First, Look for Leaks
One little leak might not seem like a big deal, but having several can add up to the equivalent of leaving open a small window. It usually costs very little money to identify and fix ways your home passively wastes energy, but it yields significant savings.
You can sleuth out major leaks on your own. Turn off your furnace on a cool, very windy day; shut all windows and doors; turn on all exhaust fans that blow air outside, such as bathroom fans or stove vents; light an incense stick and move around your house, watching where smoke blows, to identify drafts.
Most leaks occur where different building materials meet—brick and wood siding, foundation and walls, and chimney and siding. Other common problem areas are around windows and doors; mail slots; points of entry for electrical and gas lines, cable/internet wiring, and phone lines; outdoor water faucets; where vents pass through walls; cracks or gaps in siding, stucco, masonry, and all foundation materials; and around window air-conditioning units.
Use caulk to seal any cracks or gaps measuring less than ¼-inch wide, and use polyurethane foam sealant for larger ones.
To minimize leakage around doors and windows, install weatherstripping and add sweeps to the bottoms of all exterior doors.
Prevent drafts around outlets and light switches located inside exterior walls by adding insulating receptacle gaskets (less than $1 each).
If you have window AC units, remove them during the winter, or insulate them from the outside with an AC cover ($10 to $40). During summer, install units so they fit tightly within windows.
Together, these measures can save you five to 20 percent on heating and cooling costs.

Want Help? Hire an Energy Auditor
A good energy auditor can track down leaks and use equipment to identify leaks you might not find yourself.
Most auditors offer both quick assessments and full inspections. Utility companies sometimes pay for the quickies.
A comprehensive audit typically costs $400 to $800, depending on your home and whom you hire. The inspector will examine all features of your residence and evaluate your utility spending for the last year. For a full audit, the company should use a calibrated blower door to measure the overall air leakage of your home and perform a thermographic inspection using an infrared camera. Confirm in advance that it will do these tasks; if not, find another company.
In the “Energy Use Consultants” section here at Checkbook.org, we provide customer reviews we’ve collected from local homeowners for auditors they hired. You also may as well hire one that is a Certified Home Energy Rater by the nonprofit Residential Energy Services Network (RESNET). Certified auditors must complete RESNET’s training program, pass its exams, and carry a minimum of $500,000 in liability insurance.

Do You Need to Add Insulation?
All structural elements enclosing your home’s living spaces should be insulated. It’s most practical to add insulation when a home is built or during renovations. Otherwise, accessibility drives costs and often determines what’s worth doing.
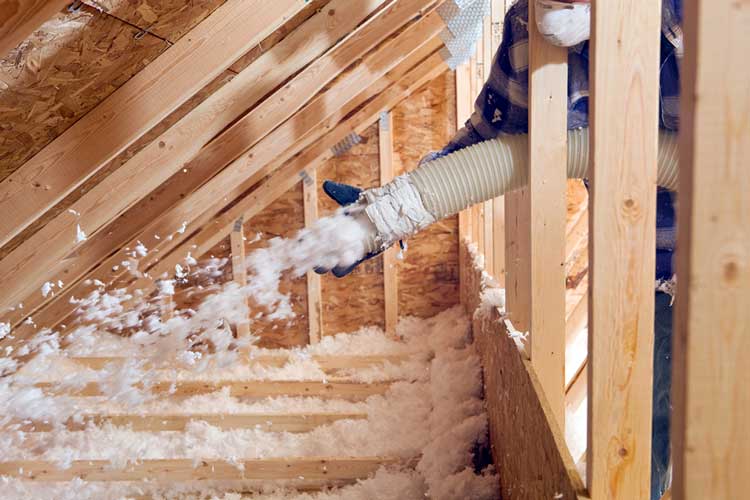
Because warm air rises, your attic is the front line in the battle to conserve energy during winter. And because most attics are unfinished and contain a lot of empty space, adding a thick layer of insulation is easy.
In this region, the U.S. Department of Energy (DOE) recommends attics be insulated at R-49 or better. Check which type of insulation you already have (loose fibers, granules, batts, etc.) and measure its thickness. To achieve an R-49 rating, loose fiberglass particles should be laid at a thickness of about 20 inches, rock wool particles at 17 inches, cellulose (looks like shredded newsprint) at 13 inches, and batts (blankets that come in rolls) at 15 inches.
Unheated areas underneath ground floors (crawlspaces, basements) are also good places to add insulation. Crawlspaces should be dry year-round (moisture causes insulation to deteriorate), and a vapor barrier should be placed on the floor of the crawlspace.
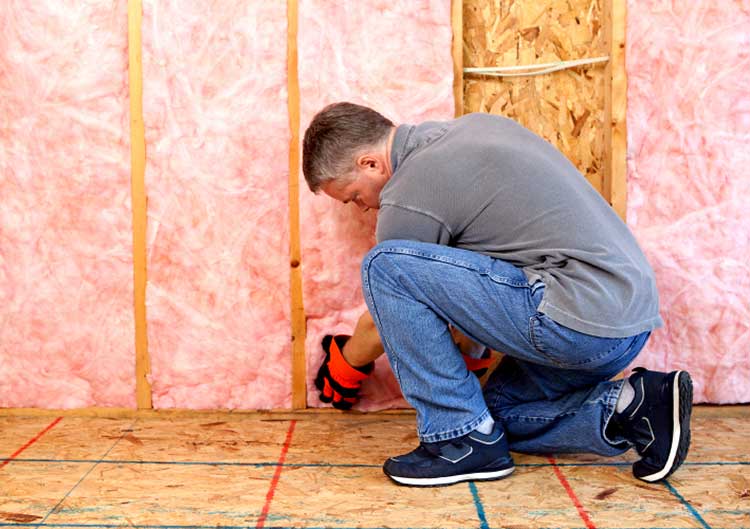
If your home was built in the 1970s or later, its exterior walls probably have adequate insulation. If your home is older, it might be worthwhile to add insulation or improve what has deteriorated. To do so, installers have to drill access holes between each pair of wall studs, blow in insulation, and then patch and reseal the openings. This is much more time-consuming, messy, and costly than insulating an open unfinished attic or a crawlspace. But if you’re doing a major renovation or replacing siding, it’s worth adding this task: For an average-size home in this area, adding R-11 of insulation to poorly insulated exterior walls will likely save $300 to $400 in energy costs per year.
Is It Worth It?
Doing basic air-sealing work like installing weatherstripping within exterior doorways and filling obvious gaps is a no-brainer. In the Delaware Valley area, rudimentary sealing tasks will net most homeowners about $110 a year in energy savings; if your home is particularly drafty, you’ll save twice that.
Your attic is the next best target for an energy savings project. In most homes, attics are easily accessed and unfinished—and most don’t have enough insulation. How much you’ll pay to add insulation to your attic depends on its size and how much is already there but, more importantly, whom you hire to do it: When our undercover shoppers collected prices from a sample of area companies to increase the insulation rating from R-11 to R-49 in a sample unfinished attic, proposed costs ranged from about $1,500 to more than $3,000.
The work isn’t cheap, but it’s worth doing. We ran the numbers for a sample average-size area home and found that improving its attic insulation from R-11 to R-49 would generate utility savings of about $110 per year.
Hiring an Installer
Quality installation maximizes your insulation’s effectiveness. Fortunately, many area contractors are equal to the job. Here at Checkbook.org, you’ll find ratings and reviews submitted by local consumers for insulation companies they’ve used; that feedback is for the most part positive.
Since most insulation contractors seem to do satisfactory work, and because prices vary widely from company to company, get several price quotes. Ask prospective companies how they plan to do the work, what materials they plan to use, and why. Be wary of exaggerated claims of energy savings. Be sure to ask contractors for proof of worker’s compensation and liability coverage.
Get a contract that details the size of the area to be insulated, what type and how much insulation will be installed, and the resulting R-value (required by the Federal Trade Commission). For blown-in loose-fill insulation, the contract should also state the depth in inches of insulation present before new insulation is added and the depth after the work is done. If the company will be sealing cracks and other infiltration points, make sure the contract specifies where those areas are.
If your project qualifies for a rebate from your utility company, confirm that you’ll qualify for the incentive. These programs usually require homeowners to work with utilities’ “approved” contractors or to file paperwork before work begins.
Before insulation is added, a rep should inspect the jobsite and check for any issues—for example, to make sure there is no exposed wiring. (Insulation cannot be installed over old knob-and-tube-style wiring.)
Other matters to get in a contract:
- In attic spaces, the contract should promise that the insulation won’t block attic vents. Typically, a company will use fiberglass batts to build dams around spaces that should not be covered by insulation. In addition, be sure your attic’s access panel or pull-down stairway gets insulated, too.
- Check for any recessed lighting fixtures (like can lights) that are exposed in the attic. If they are marked “IC” it means insulation can contact them. If they are not IC-rated, be sure the contractor promises to keep insulation a minimum of three inches away, to avoid a fire hazard.
- If ductwork, boiler pipes, or hot-water-supply pipes run through the area you’re insulating, the contract should require the contractor to insulate them with R-6 insulation.
- If you will be insulating walls, the contract should specify where the company will create holes, how many, and how the openings will be closed and repaired.
- Reference in the contract a material fact sheet, which the company should attach, describing the insulation that will be installed (contractors are legally obligated to do this upon request).
- Unless your job requires more than one day’s work (most don’t), don’t pay until all work has been completed.
- Before paying, check that all cracks were sealed as agreed upon, that the amount of insulation added matches the proposal, and that loose-fill insulation was applied evenly. Also, make sure the crew cleans up the area.